


Models
>
SHX68T55UC
SHX68T55UC (07) Bosch Dishwasher - Overview
Sections of the SHX68T55UC
[Viewing 6 of 6]


Keep searches simple, eg. "belt" or "pump".

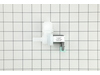
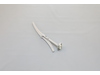
Dishrack Roller - Grey
PartSelect #: PS8727387
Manufacturer #: 00611475
This is a replacement dishrack roller or wheel for your dishwasher. It is made of gray plastic, measures a little over an inch in diameter, and is sold individually. This roller is designed for the lo...
$15.20
In Stock


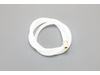
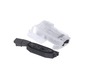
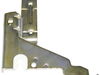
Mounting Bracket
PartSelect #: PS8728568
Manufacturer #: 00619985
Sold individually.
$11.03
In Stock


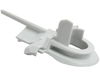
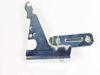
Adjustable Tine Row Clip
PartSelect #: PS8727471
Manufacturer #: 00611981
This part is a replacement tine row clip for your dishwasher. The tine row clip is adjustable, and it fits onto your dishrack to holds the tines into place. If your dishrack tine rows will not stay in...
$7.74
In Stock

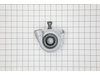
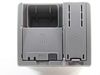
Dishwasher Circulation Pump with Heater
PartSelect #: PS11724988
Manufacturer #: 12008381
This circulation pump with heater is for dishwashers.
Circulation pump with heater moves heated water through the spray arm to clean the dishes.
Unplug the dishwasher before installing this part...
$185.53
In Stock


Questions And Answers for SHX68T55UC
We're sorry, but our Q&A experts are temporarily unavailable.
Please check back later if you still haven't found the answer you need.
- < Prev
- 1
- Next >
Sort by:
Search filter:
Clear Filter
Your search term must have 3 or more characters.
Keep searches simple. Use keywords, e.g. "leaking", "pump", "broken" or "fit".
Sorry, we couldn't find any existing answers that matched.Try using some different or simpler keywords, or submit your new question by using the "Ask a Question" button above!
Curtis
February 23, 2022
Will cycle. Error code E24 Watertap. What causes this issue and how to fix it.
For model number SHX68T55UC

Hello Curtis, Thank you for the question. The E24 Error Code indicates the dishwasher is not draining properly due to the drain filter, hose or pump being blocked. We suggest checking the parts for any clogs or blockages. We hope this helps!
Was this helpful?
Thank you for voting!
Frances
October 29, 2023
Having issue with bottom rack in dishwasher. When loaded, it falls off the “track”.. occasionally the wheels come off. Nothing seems bent. Ideas?
For model number SHX68T55UC
Hello Frances, thank you for your inquiry. If your wheels fall off, the only feasible solution is to replace them. The dishrack roller, part number PS8727387, is compatible with your model. We hope this solves your problem!
Was this helpful?
Thank you for voting!
Related Parts:
Dishrack Roller - Grey

$15.20
In Stock
- < Prev
- 1
- Next >
Common Symptoms of the SHX68T55UC
[Viewing 10 of 10]Leaking
Fixed by
these parts
these parts

Show All
Not draining
Fixed by
these parts
these parts


Show All
Not cleaning dishes properly
Fixed by
these parts
these parts
Show All
Door latch failure
Fixed by
these parts
these parts


Show All
Not drying dishes properly
Fixed by
these parts
these parts
Show All
Will Not Start
Fixed by
these parts
these parts
Show All
Will not dispense detergent
Fixed by
these parts
these parts

Show All
Door won’t close
Fixed by
these parts
these parts
Show All
Will not fill with water
Fixed by
these parts
these parts
Show All
Noisy
Fixed by
these parts
these parts
Show All
Keep searches simple. Use keywords, e.g. "leaking", "pump", "broken" or "fit".
E:15 error code with Watertap
The E:15 error code means water is detected in the pan under the unit. There are several ways this can happen.
In this case, it was caused by a bad inlet valve. It did not close properly and led to an overflow of water inside that eventually spilled into the pan underneath the unit.
I see now why the pump keeps running after this error. In this case, it would have led to a big flood in the kitchen if it did not.
I was actually able to run the unit while broke by manually operating the valve under our sink that provides water to the unit.
Be sure to turn off breaker before servicing. Don't get shocked!
Be sure to turn off water before starting! Or, you'll have a flood.
Anyway, I just pulled the unit out (was secured by 2 screws on the sides). I lifted up the insulation material on the left side to get at the valve. Pushed a little green tab to release the electrical plug. Then, use pliers to move clamp off the white water hose on the inside. Then, pull of white hose. This was hard in my case. Took a lot of force. Then, reach behind the unit and use pliers to unscrew water hose. Now, the whole gray panel there can pop out with some force. Then, slip the old valve out and slip new one in. Reconnect hoses and clamp. Note that I put some caulk on the connector where white hose goes. Not sure if needed or not.
Good luck!
Parts Used:
-
Raymond from VIENNA, VA
-
Difficulty Level:Easy
-
Total Repair Time:30 - 60 mins
-
Tools:Pliers
27 of 39 people
found this instruction helpful.
Was this instruction helpful to you?
Thank you for voting!
The middle rack was rusting and some of the pegs were coming off.
Removed the spray arm, front handle, and little clips from the old rack and installed onto the new rack. Was very simple.
Parts Used:

-
Susan from MIDDLEBURY, VT
-
Difficulty Level:Really Easy
-
Total Repair Time:15 - 30 mins
12 of 14 people
found this instruction helpful.
Was this instruction helpful to you?
Thank you for voting!
rollers broke
pushed with thumb pressure and snapped rollers into place.....EASY
Parts Used:
-
Dennis from PLEASANTVILLE, NJ
-
Difficulty Level:Very Easy
-
Total Repair Time:Less than 15 mins
13 of 18 people
found this instruction helpful.
Was this instruction helpful to you?
Thank you for voting!